Guessing Game in the browser
We are going to do some things a little strangely in this example, to show you the other extreme of web development - where virtually everything is done client-side. This will be an extreme example - and we'll get rid of a lot of features we've created throughout this book. Don't get too thrown off though, we'll soon add all of these features (logins, history, sessions, etc) back. Ultimately, this example is a pit stop towards building true web application that blend the use of client side with server side functionality.
Back to static web sites
First off, while we are still using express, we are using it simply to serve HTML, CSS, and JavaScript files from the /public directory. We won't have a database, and there's no .env file. There are no routes, no pug either. Just a simple express app, serving static content:
- /client-side
  - server.js
  - package.json
  - public/
    - guess.css
    - guess-client.js
    - guess.html
Here's the contents of server.js:
const express = require("express");
const app = express();

app.use(express.static("public"));

app.listen(process.env.PORT || 8080, () => {
  console.log(`Guessing Game app listening on port 8080`);
});
The package.json wont' have any dependencies other than express.
{
  "dependencies": {
    "express": "^4.21.1"
  }
}
The public directory is where all of our work will go.
The Styling - CSS
Before moving on to the new stuff, a note on the CSS file. guess.css is going to be exactly the same as our last example. We are ultimately going to have the same exact HTML - so we'll keep the styling exactly the same.
You can take a look at the code now, but if you followed along with everything in the last chapter, there's nothing new here.
The HTML
The big change is that we are going to be building an application entirely driven by JavaScript. To grasp what this means, you'll need to understand a few things:
- Our application will serve one, large(ish) HTML page, containing all the sections of our application. JavaScript will hide and show different aspects of the page based on the application state.
- JavaScript, running in the browser, will be responsible for application state.
Our guessing game has three main screens:
- The first page, which explains the game, and has a form for the user to enter a guess.
- A second page that is similar to the first, that is shown whenever the user guesses wrong. The page tells the user they've guessed too high or low, and lists their previous guesses. It has a form for the user to enter the next guess.
- The third page is reached when the user guesses successfully. This page simply tells them they guessed correctly, and has a link to play again - taking the user back to the first screen.
Things happen on each page - and those things used to happen on the server. One the first page, we typically generate a new random number. When the user submitted the form on the first page, the server would check the value, and render either the second page or the third page (success).
No HTTP after page load
The departure from server-side programming starts on the first guess. Our HTML will have a form, but the form will not submit to the server. Instead, we will be attaching event handlers to the submit buttons and executing code in the browser. This code will hide and show the various aspects of the page, based on what the guess was.
The HTML Skeleton
Let's look at the HTML we will serve on page load. It will contain the structure for all three "pages" of our previous applications, along with the appropriate including links for CSS and (soon) JavaScript.
<!doctype html>
<html lang="en">
    <head>
        <meta charset="UTF-8" />
        <meta name="viewport" content="width=device-width, initial-scale=1.0" />
        <link rel="stylesheet" href="guess.css" />
        <title>Guessing Game</title>
    </head>
    <body>
        <!-- This is the page that shows the first set of instructions, and the initial form -->
        <section id="start" class="main-content">
            <p class="guess-instructions">
                I'm thinking of a number from 1-10!
            </p>
            <div class="guess-grid">
                <!-- This form is going to be exactly the same in the second page, other than the input element
                     having a different ID.  We can probably do better, but as an example we'll keep the redundancy
                     so the code doesn't get complicated -->
                <form class="rounded-section guess-form">
                    <label for="guess">Enter your guess:</label>
                    <div class="guess-input">
                        <input
                            autocomplete="off"
                            id="first_guess"
                            class="guess-input"
                            name="guess"
                            placeholder="1-10"
                            type="number"
                            min="1"
                            max="10"
                        />
                        <button type="button">Submit</button>
                    </div>
                </form>
            </div>
        </section>

        <!-- This is the page that shows the error message when the guess is incorrect -->
        <section id="guess" class="main-content">
            <p id="sorry_message" , class="guess-feedback">
                <!-- This will eventually say something like, "Sorry, your guess was too low, try again! -->
            </p>
            <div class="guess-grid">
                <form class="rounded-section guess-form">
                    <label for="guess">Enter your guess:</label>
                    <div class="guess-input">
                        <input
                            autocomplete="off"
                            id="guess"
                            class="guess-input"
                            name="guess"
                            placeholder="1-10"
                            type="number"
                            min="1"
                            max="10"
                        />
                        <button type="button">Submit</button>
                    </div>
                </form>
                <ul class="guess-list"></ul>
            </div>
        </section>

        <!-- This is the page that shows the congratulations message -->
        <section id="complete" class="main-content">
            <h1>Great job!</h1>
            <div class="rounded-section correct">
                <h1 id="success_message">
                    <!--This will eventially say something like "5 was the number!" -->
                </h1>
                <p id="count_message">
                    <!-- This will eventually say something like "It took you 5 guesses!" -->
                </p>
            </div>
        </section>
        <nav class="play-new">
            <p><a href="#">Start over</a></p>
        </nav>
    </body>
</html>
There's a lot to look at here. Let's see what it looks like first:
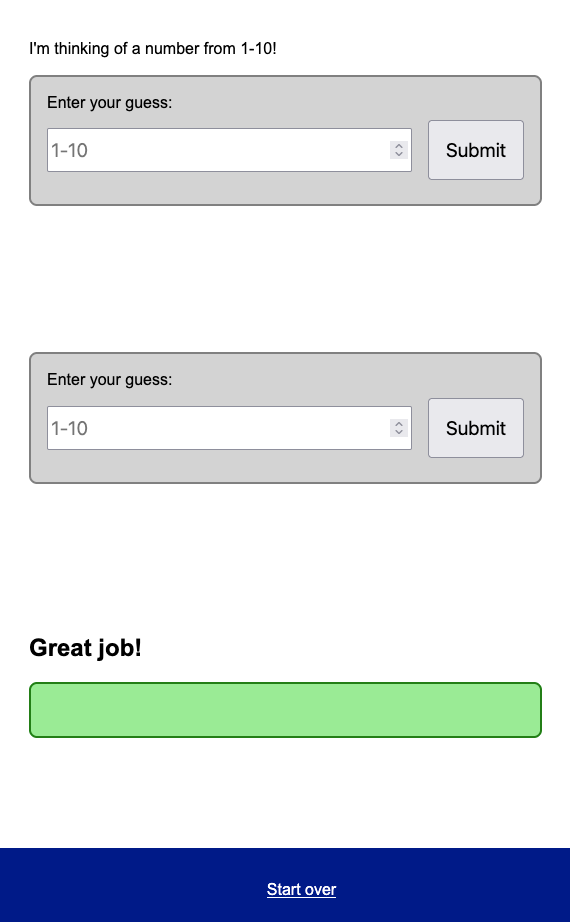
We have TWO forms, two inputs. At first, this might seem quite odd - but remember, we are going to add JavaScript to control the state of the application in a moment, and then show and hide various parts of HTML based on the state.
When you look at the HTML, you'll notice that we've added id values to a lot of elements. These are the element we'll need to locate, and modify as the game progresses. For example, when the user makes an incorrect guess, we'll change the HTML inside the p element with id "sorry_message" to tell them!
There are also some placeholders were additional dynamic content will appear - like guess-list.
Pug?
As an aside - if you are anything like me, once you got used to pug, you started disliking writing regular HTML. If you wanted to use pug for this, you certainly could have - but you can't serve a pug file from the public directory. Remember, when we use pug, we are rendering the pug template server-side, in a route. The pug template is rendered to HTML, and sent to the client. You could certainly do this, and still consider your application "client side" - and we will return to pug in the next chapter. For now though, we'll stick with HTML to drive the point home - the server is out of the picture for this example, other than serving the static HTML content over HTTP on page load.
Application State in JavaScript
Now let's link guess.js into our HTML page, in the <head> of our page.
<script src="guess.js"></script>
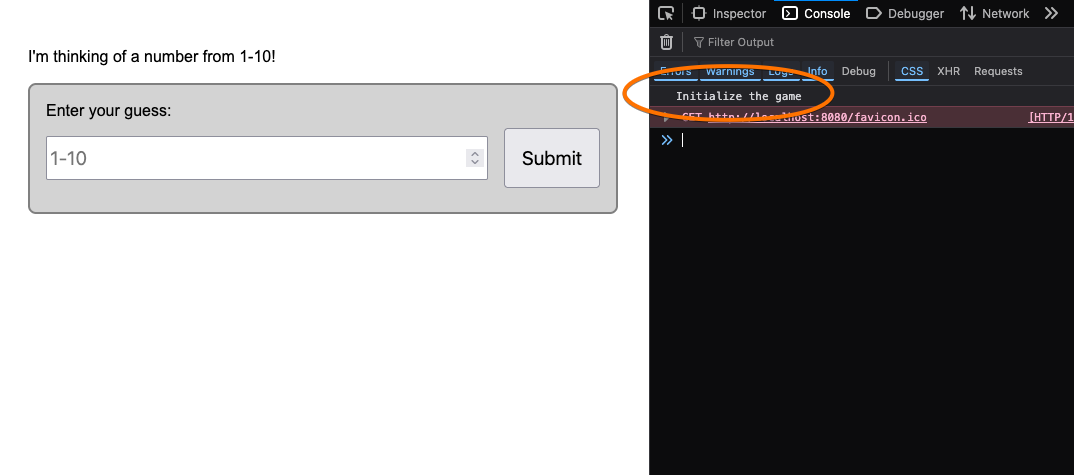
Inside guess.js (in the public directory), let's put a single function called init and just print out a simple message.
const init = () => {
  console.log("Initialize the game");
};
When we load the page, we want this function to execute, to initialize the game. We can add an onload handler to the main body element to achieve this.
 <body onload="init()">
    ...
It's a good idea to check that everything is hooked up correctly. Open your developer tools and make sure the print out is visible when the page is loaded (click refresh)
Application State: Starting the Game
Now it's time to create the guessing game all over again! When the start page is loaded (init), we will want to do the following things:
- Create a random number between 1 and 10, and save it in a global variable so we can use it later
- Show the start page, hide the other pages
Since we are going to be showing and hiding pages a lot, let's create a small utility function to help:
let secret;

const mask = (showStart, showGuess, showComplete) => {
  document.getElementById("start").style.display = showStart ? "block" : "none";
  document.getElementById("guess").style.display = showGuess ? "block" : "none";
  document.getElementById("complete").style.display = showComplete
    ? "block"
    : "none";
};

const init = () => {
  console.log("Initialize the game");
  secret = Math.floor(Math.random() * 10) + 1;
  console.log("Secret = ", secret);
  mask(true, false, false);
};
Now on page load, we see only the first page is visible, and the secret number has been generated.
Application Action: Make a guess
The user going to make a guess by entering a number in the input element and clicking the associated Submit button. We need a handler for this. We are going to do this on the button on the start page now, but we will also need to do this for the same structured form on the guess page - which is where subsequent guesses get entered. With that in mind, we'll make the event handler a little smart in terms of which input element it takes the entered value from. Instead of selecting any input element, or needing to know the id of the input element, we will select the sibling of the button itself. This means the same event handler will work later when we do the subsequent guesses.
const make_guess = (event) => {
  const inputElement = event.target.previousElementSibling;
  if (inputElement && inputElement.tagName === "INPUT") {
    const inputValue = inputElement.value;
    console.log("Input value:", inputValue);
  }
};
We'll attach this to the submit button
<button type="button" onclick="make_guess(event)">Submit</button>
Now, when we click the Submit button after entering a value in the input field, we'll see the printout.
UX Tweaks
Note the page isn't reloading when the user clicks the button. This is by design, the form isn't being submitted, since there's no action or method attribute. We expect the guess to be processed, and the input element to clear though. Whether the guess was right or wrong.
We can simulate this by capturing the value, and then clearing the input field. While we're at it, lets print out to the console whether the guess was too high or low, and set the mask so the new page (guess) is shown if the guess is wrong, and the complete page is shown if they are correct.
const make_guess = (event) => {
  const inputElement = event.target.previousElementSibling;
  if (inputElement && inputElement.tagName === "INPUT") {
    const inputValue = inputElement.value;
    if (inputValue > secret) {
      console.log("Guess was too high");
      mask(false, true, false);
    } else if (inputValue < secret) {
      console.log("Guess was too low");
      mask(false, true, false);
    } else {
      console.log("Guess was perfect!");
      mask(false, false, true);
    }
    inputElement.value = "";
  }
};
Since we will be showing the second screen now, for a subsequent guess, let's also add the make_guess callback work with the button in the second form too.
<!-- This is the button in the second form-->
<button type="button" onclick="make_guess(event)">Submit</button>
We can actually start testing the application now. After each guess, we'll see the right screen - but the screens won't have much of the detail we want.
For example, the "guess" page won't tell the user if they were too high or low. It won't have the guess list.
Populating the HTML
Let's attack the logic for incorrect guesses. We have a p element with the id sorry_message that is supposed to tell the user what was wrong with their guess. Let's set that when they enter a guess:
const make_guess = (event) => {
  const inputElement = event.target.previousElementSibling;
  if (inputElement && inputElement.tagName === "INPUT") {
    const inputValue = inputElement.value;
    if (inputValue > secret) {
      document.getElementById("sorry_message").innerText = `Sorry, ${inputValue} was too high`;
      mask(false, true, false);
    } else if (inputValue < secret) {
      document.getElementById("sorry_message").innerText = `Sorry, ${inputValue} was too low`;
      mask(false, true, false);
    } else {
      console.log("Guess was perfect!");
      mask(false, false, true);
    }
    inputElement.value = "";
  }
};
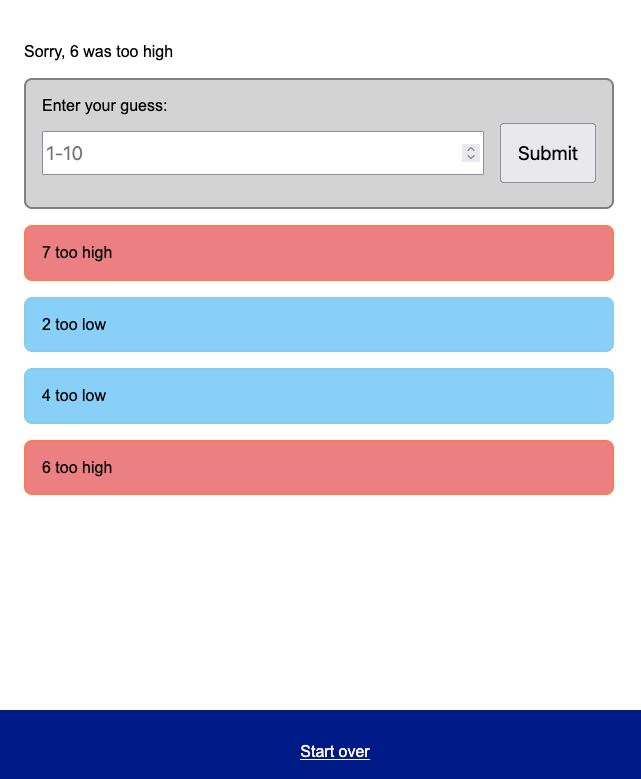
Our versions of guessing always created a list of guesses as we went, and we had nice styling to visually indicate guess status. Let's add that by building li elements inside guess-list when the guess is wrong:
if (inputValue > secret) {
  document.getElementById("sorry_message").innerText = `Sorry, ${inputValue} was too high`;
  const guessList = document.querySelector("ul.guess-list");
  const newListItem = document.createElement("li");
  newListItem.className = "rounded-section high";
  newListItem.innerText = `${inputValue} too high`;
  guessList.appendChild(newListItem);
  mask(false, true, false);
} else if (inputValue < secret) {
  document.getElementById("sorry_message").innerText = `Sorry, ${inputValue} was too low`;
  const guessList = document.querySelector("ul.guess-list");
  const newListItem = document.createElement("li");
  newListItem.className = "rounded-section low";
  newListItem.innerText = `${inputValue} too low`;
  guessList.appendChild(newListItem);
  mask(false, true, false);
}
Now as we guess, elements will be created and displayed!
Finishing up with success
Let's just finish this up by adding the appropriate message on the complete page. We left two elements - #success_message and #count_message blank. The success message is easy:
else {
  console.log("Guess was perfect!");
  document.getElementById("success_message").innerText =`${inputValue} was the number!`;
  mask(false, false, true);
}
The count message should say how many guesses it took the user. We'll need to add another global variable for that - let's make it a list of guesses, along with their high/low values.
let guesses = [];
We'll add a new guess every time the user adds one:
const make_guess = (event) => {
  const inputElement = event.target.previousElementSibling;
  if (inputElement && inputElement.tagName === "INPUT") {
    const inputValue = inputElement.value;
    if (inputValue > secret) {
     ...
     guesses.push({guess: inputValue, result: "high"});
     ...
    } else if (inputValue < secret) {
      ...
     guesses.push({guess: inputValue, result: "low"});
     ...
    } else {
     ...
     guesses.push({guess: inputValue, result: "correct"});
     ...
    }
    inputElement.value = "";
  }
};
With that, we can add in the count message:
else {
  console.log("Guess was perfect!");
  guesses.push({ guess: inputValue, result: "correct" });
  document.getElementById("success_message").innerText =
    `${inputValue} was the number!`;
  document.getElementById("count_message").innerText =
    `You needed ${guesses.length} guesses.`;
  mask(false, false, true);
}
Cleaning up
The last thing we need to do to have a complete and working game is to make sure the user can play again. When they click the "Play again" link, we should call init, and enhance init to (1) clear the guesses list, and (2) delete the li elements for the guesses made.
<nav class="play-new">
    <p><a onclick="init()" href="#">Start over</a></p>
</nav>
const init = () => {
  console.log("Initialize the game");
  guesses = [];
  const guessList = document.querySelector("ul.guess-list");
  while (guessList.firstChild) {
    guessList.removeChild(guessList.firstChild);
  }
  secret = Math.floor(Math.random() * 10) + 1;
  console.log("Secret = ", secret);

  mask(true, false, false);
};
You can play the complete game (and look at the code and console input) here